The main use of working in the class is the virtual machines(ec2 in aws). To deploy one in azure, on the home dashboard, you click on the virtual machine icon
yo
You ll have the following board, showing you existing VMs , in our case, there is none create yet.

When you click on the down arrow besides the create button, you have options, can be useful when you are already advanced. Click in Azure Virtual machine to launch a new one from scratch
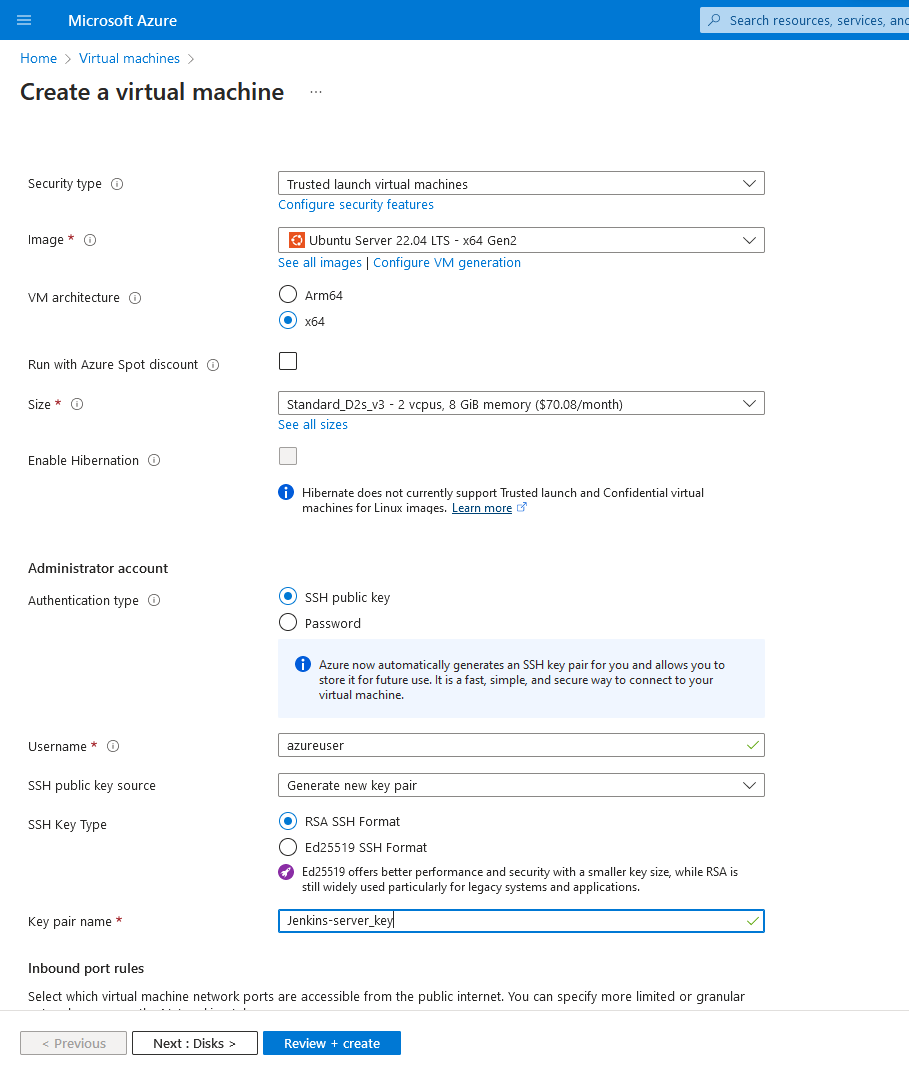
You ll get a list of options to configure , if you already launched an ec2 instance on aws, these options will be familiar, the main difference is the disk type(t2micro i.e.) as D2s here(some of which are within the free tier plan), you can use existing ssh key or generate a new one, it ll be stored in your downloads folder.

you can verify here which one will be easily manageable, cost wise
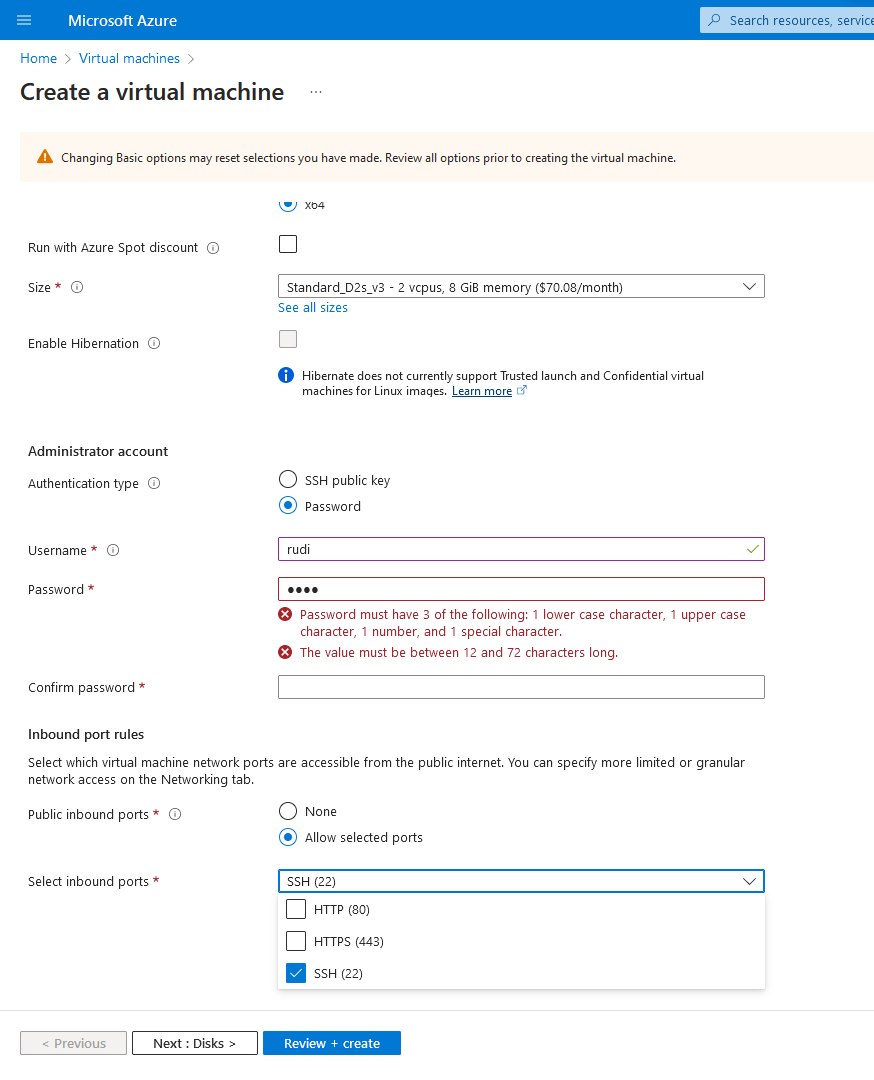
You can directly choose to connect via password here instead, a main difference with AWS (where you need to connect and enable password authentication) , you ll also enable the ports you want among those default 3.
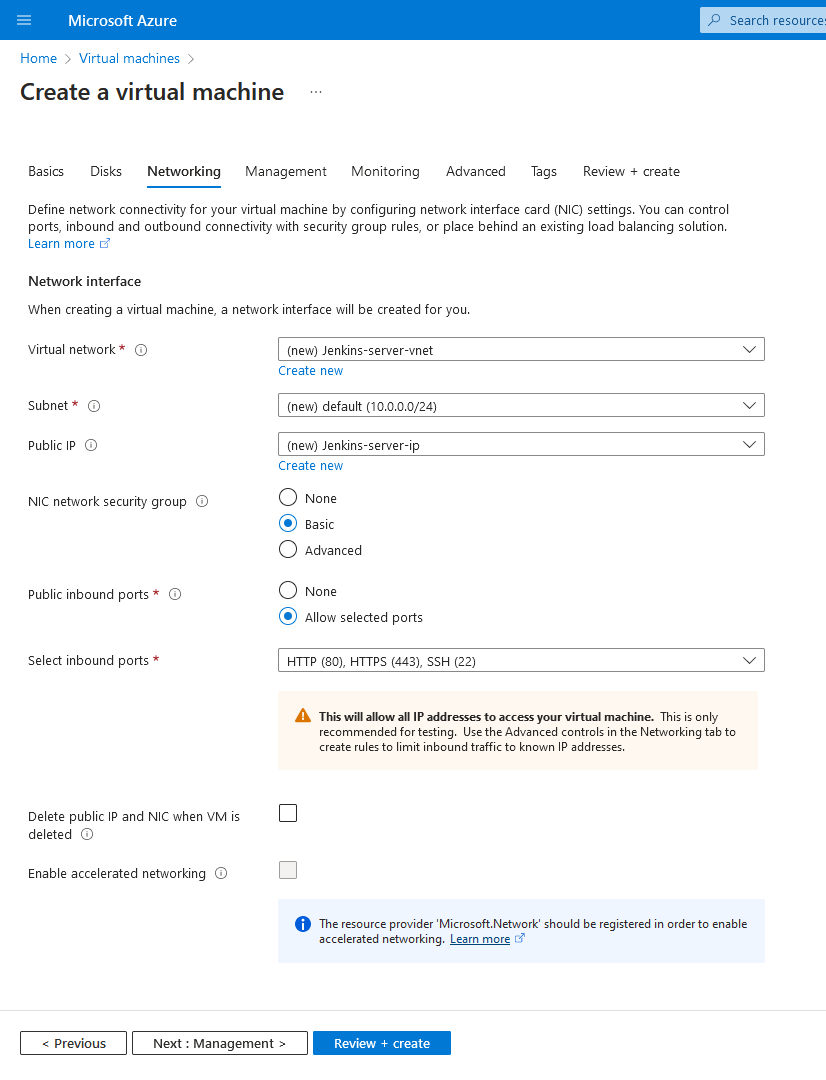
On the next tab is a service for security group , subnets and network interface (NIC) that you can leave with default value for a start, you ll configure when you ll get exactly how each work.
It s advised to check the Delete public IP and NIC when VM is deleted because even if the instance was a free tier, you ll get charged for these once it s stopped,
just like the elastic ip(linked to the nat gateway) in aws
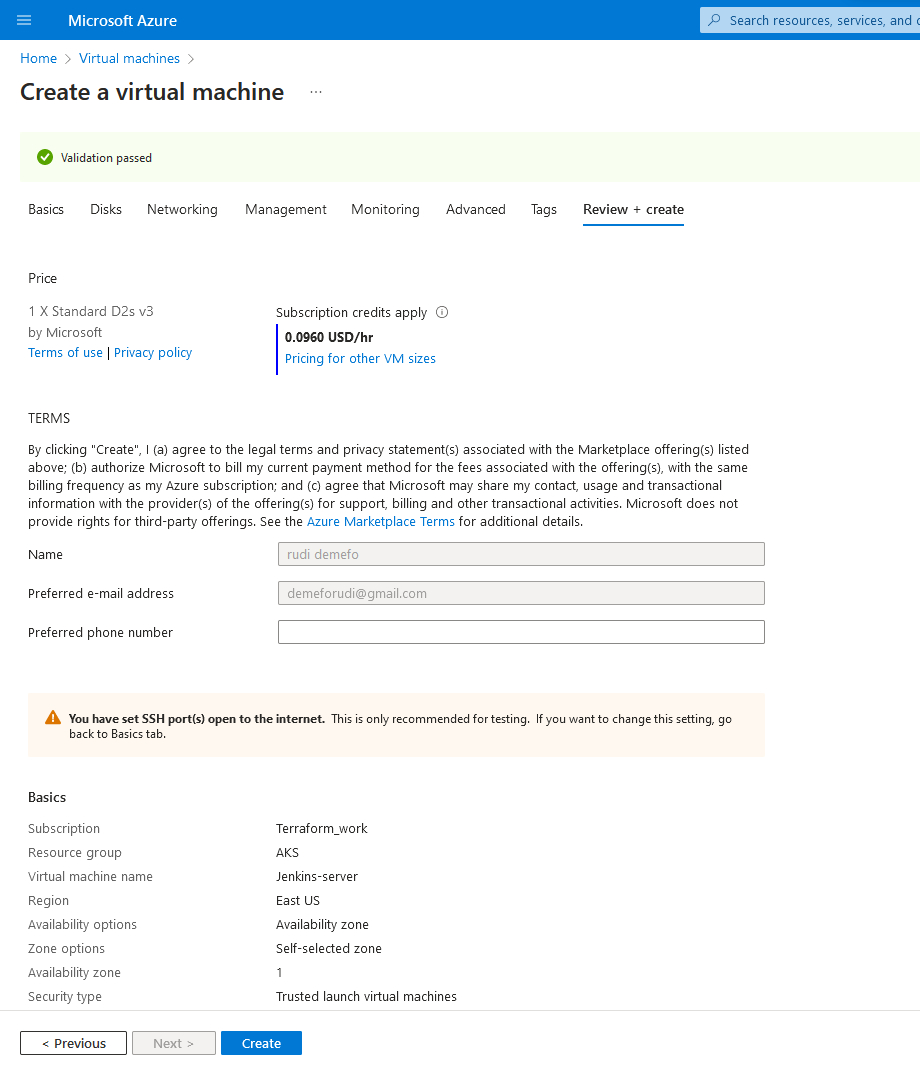
Once you re done, you verify all the parameters, and click on create.
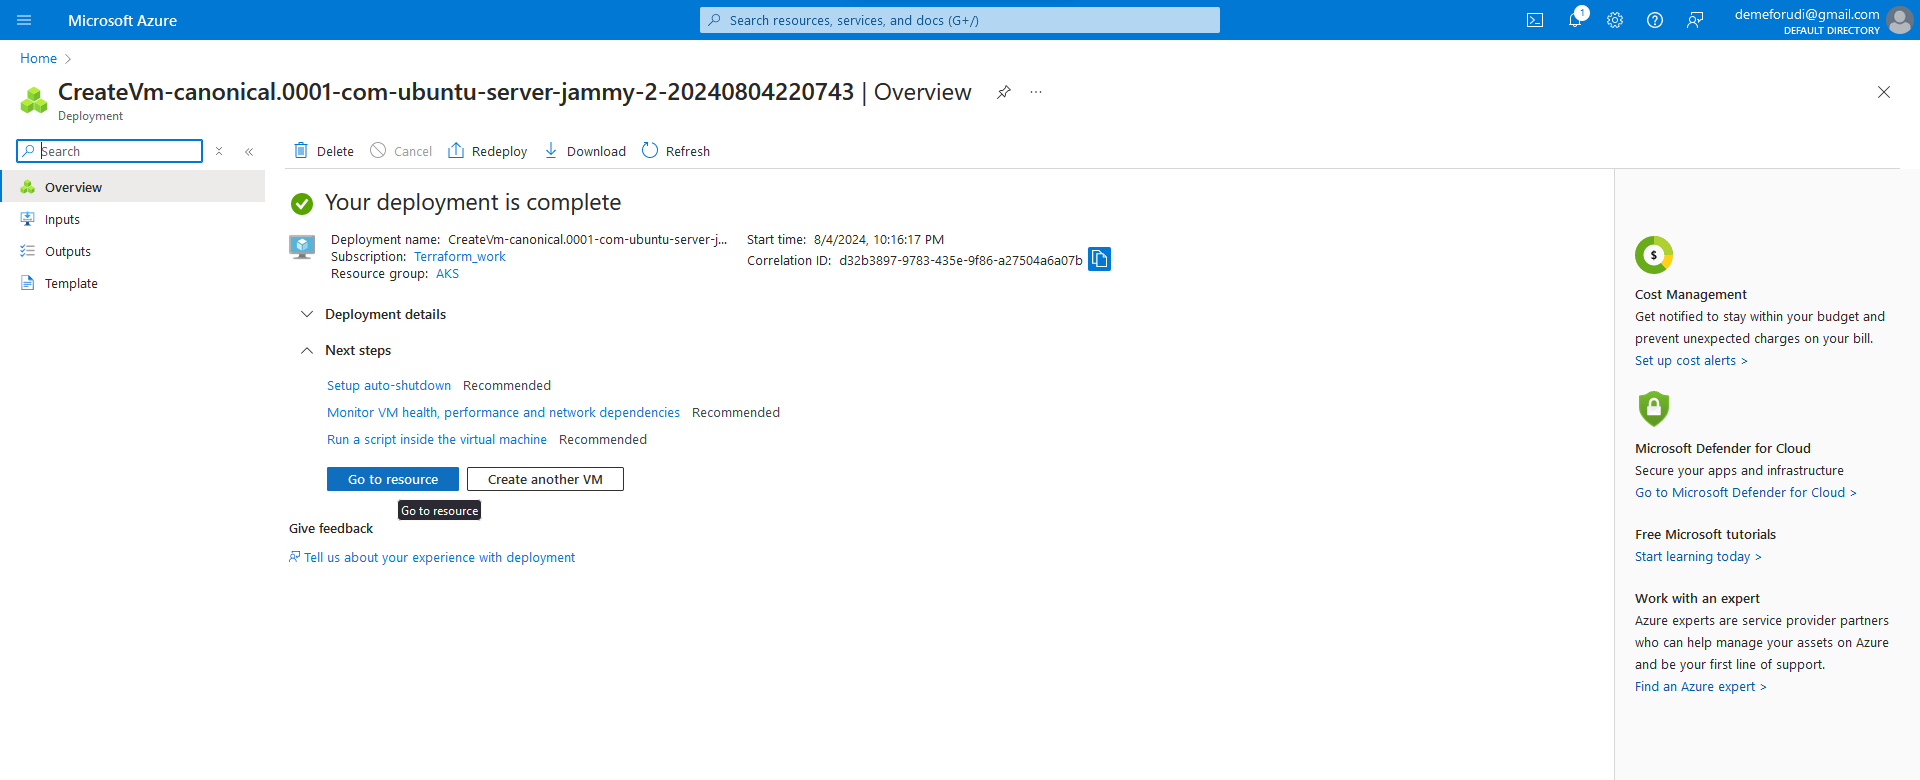
on the overview here, you click on go to resource
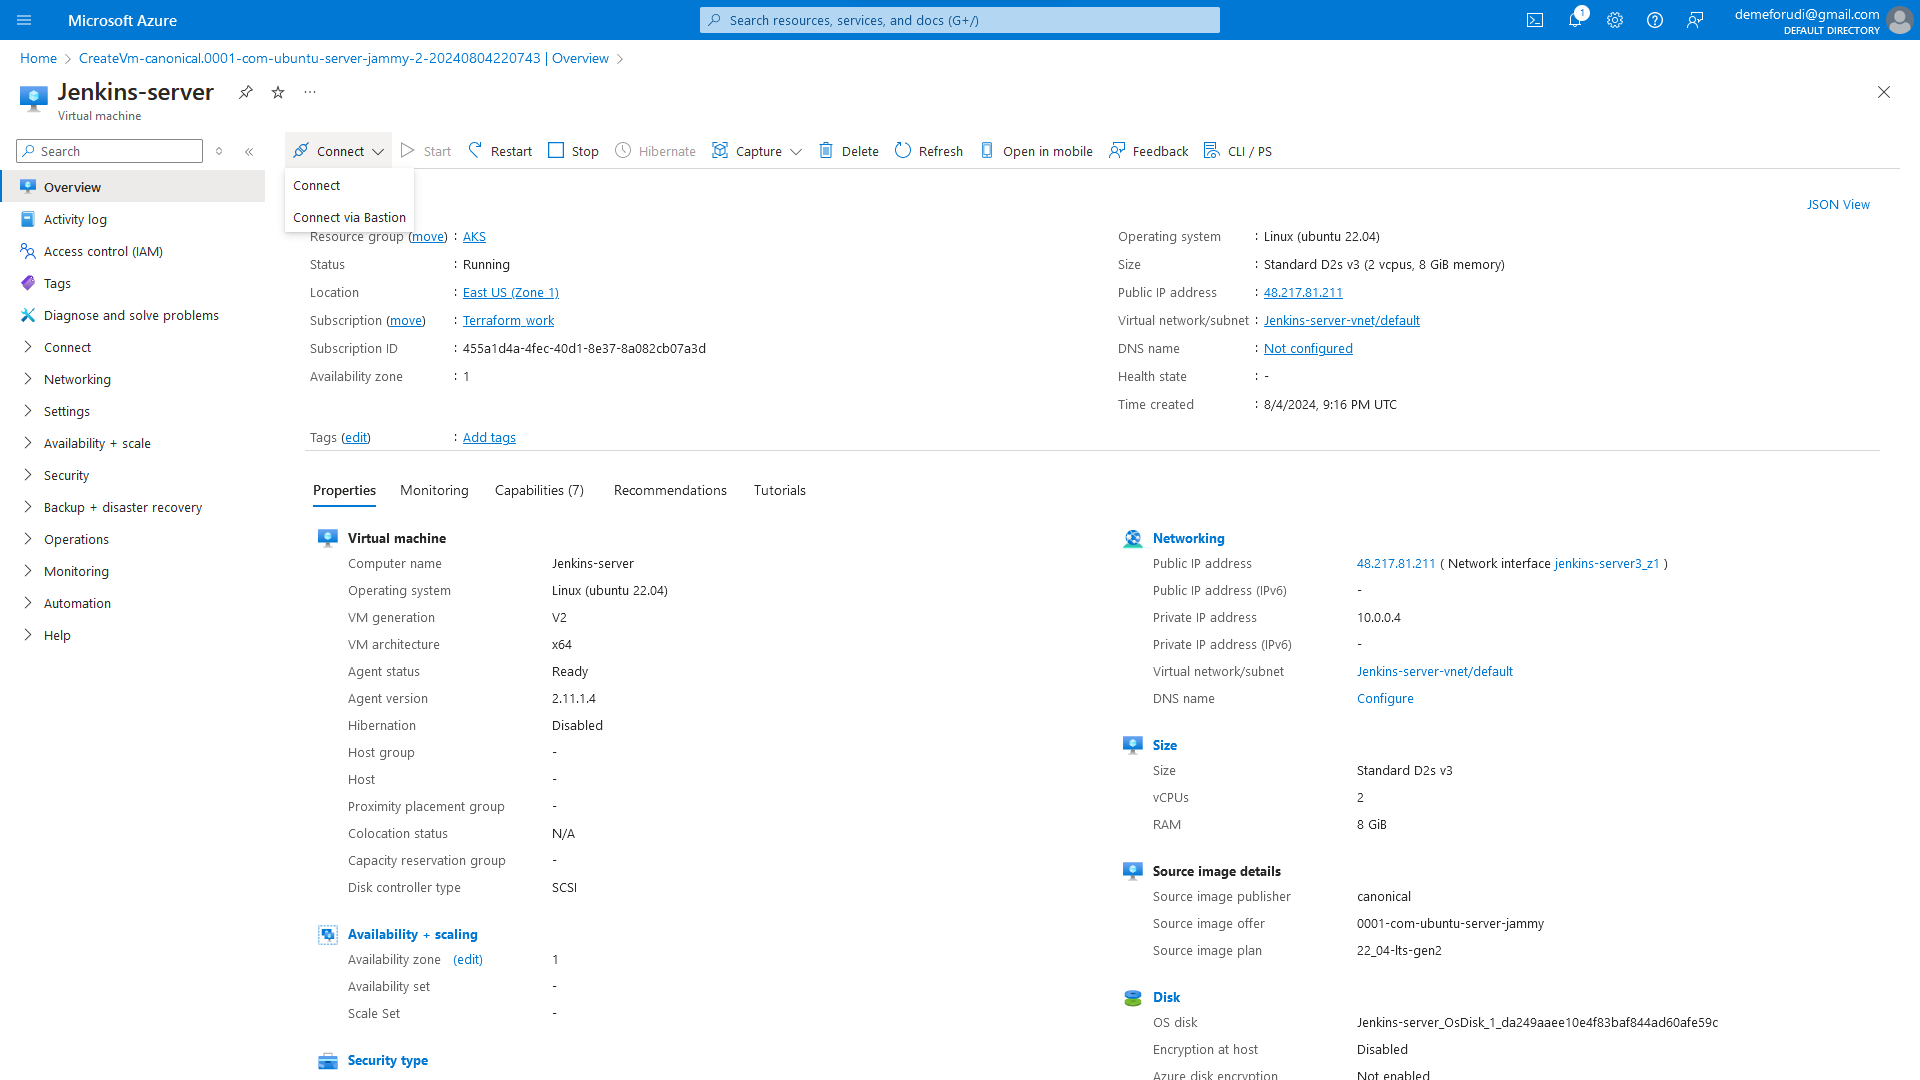
you have all your details here, then you click on connect, and chose the first one( the bastion is only when you re advanced)
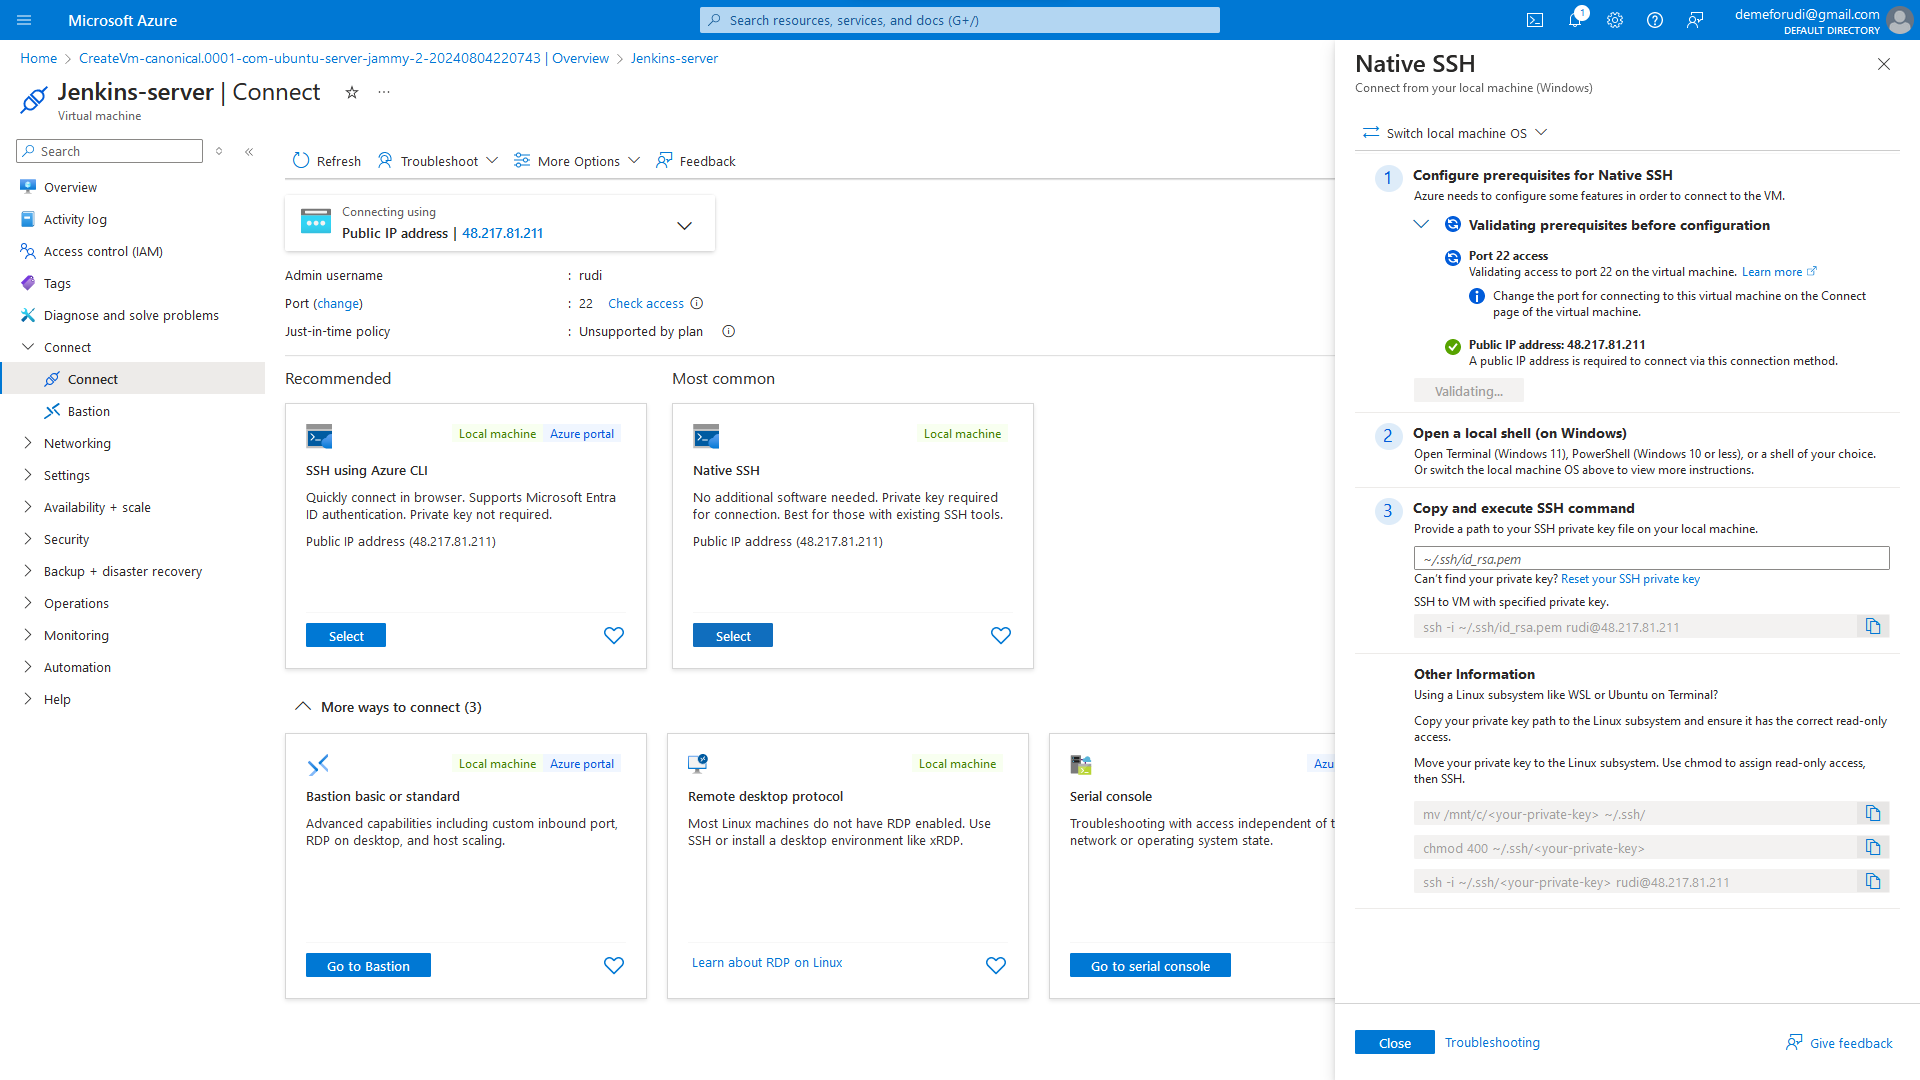 Atfer connect, the above page will open, then you use Native ssh to connect, the tab on the right will pop up, just to give you instructions in case you have a ssh key,
but since we set a password instead, we can use the public ip address and username to connect

Now we re connected , and can start working